
Network and download speeds have plagued the internet’s users for the last few decades. So the fact that download speeds can drop below your expected network speed only amplifies this statement’s validity. Although several factors impact your network’s performance, I still have multiple solutions.
Download speeds in Steam are the result of your network’s performance, where you’re downloading data from, your computer’s system resources, and even your computer’s physical hardware. Hence, I would like to propose the following five solutions.
- Ensure your CPU is not limiting your download speed
- Update your network adapters’ drivers
- Start using a trusted domain name server (DNS)
- Clear your Steam download cache
- Clear your web browser’s Steam download cache
In the following post, I’ll be walking you through your CPU’s impact on download speeds and how you can reduce its workload. I’ll also cover topics such as how you can update your network adapters’ drivers, change your DNS, clear your Steam download cache, and clear your web browser’s Steam download cache.
How do I know if my CPU is impacting my network speed?
If you experience issues downloading a game, you’ll likely fault your network; however, your network isn’t always to blame. During a download, your computer receives multiple compressed files. In their compressed state, the files are useless. Therefore, before you can use a file, your computer must decompress it. This process requires the time and attention of your computer’s central processing unit (CPU). The overall download speed will decrease if the CPU cannot decompress files fast enough. Although we can take steps to reduce our CPUs workload, we cannot bypass its specified limitations. Hence, the best action may be to replace your CPU.
Tracking system resource consumption
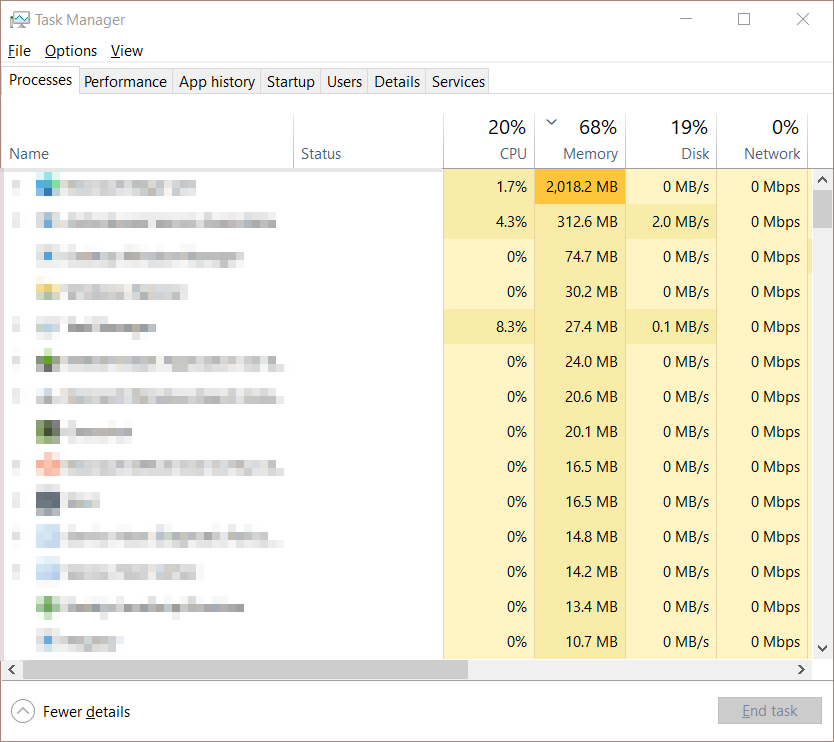
You can use the “Ctrl+Shift+Escape” shortcut to access Window’s Task Manager. The leftmost panel features a list of your computer’s active processes. The table on the right illustrates the system resources consumed by the said processes. If an inconsequential task overuses your CPU, select the program and click “End task.” Doing so will allow you to reduce the strain on your CPU.
How can I update my network adapters?
A network adapter allows your computer to connect to wireless networks. Hence, a faulty network adapter leads to network issues. Fortunately, we can fix most of these issues with a simple update to our network adapters’ drivers. A driver server is an intermediary between your computer’s installed software and its physical hardware, allowing them to communicate.
Step 1 — Launch the Windows Device Manager
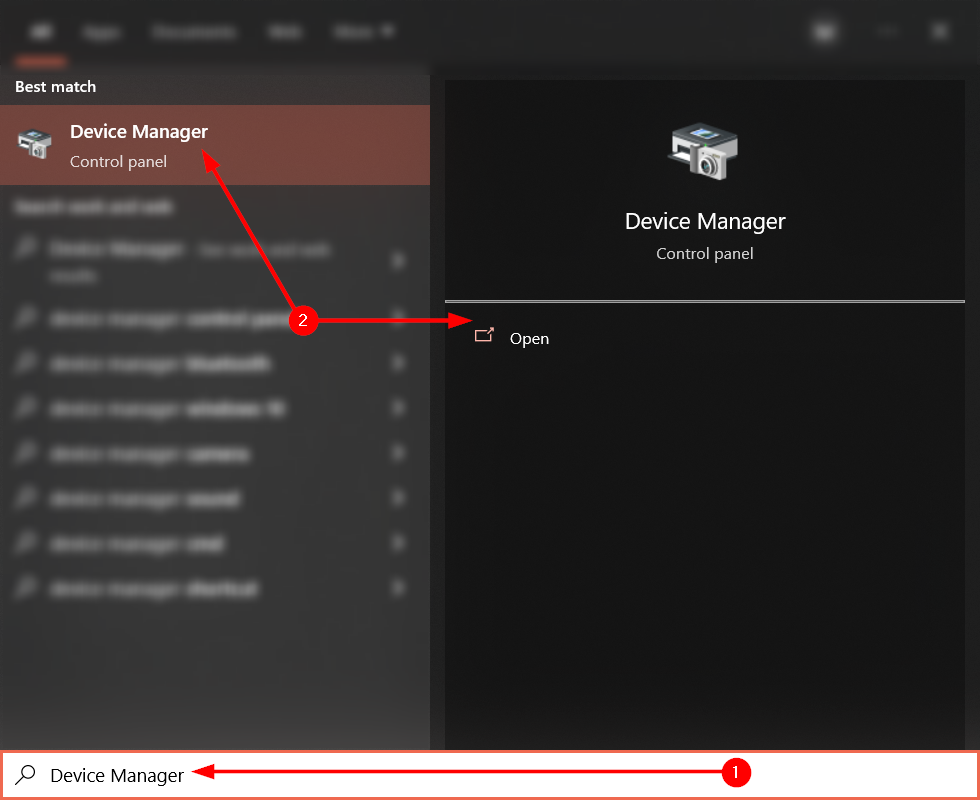
The Windows device manager allows us to manage our device’s drivers. Functions such as driver updating, erasure, and scanning take place here. To access the device manager, hit the “Start” key and search “Device Manager.” Then, tap the “Enter” key.
Step 2 — Select and update the relevant drivers
Navigate the device manager until you find the driver category “Network adapters.” Next, you will need to select and update each driver individually. To update a driver, you must select it and click the “Update” button via the taskbar.

Can you change your trusted DNS?
We best interpret DNS servers as digital phone books, this is because they are responsible for translating domain names like “google.com” to IP addresses like “142.250.187.238” In other words, they’re among the many factors impacting how you interact with the internet.
Although a DNS means we don’t have to, we can still access sites via their IP address. For example, try accessing Google by entering its IP address (142.250.187.238) into the address bar.
Step 1 — Launch Network & Internet settings
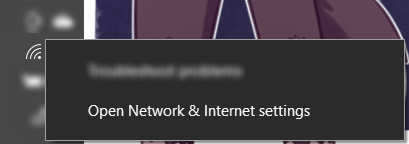
Your taskbar should feature an “Internet” icon. If you’re uncertain what I mean, look for an icon depicting a dot and three upper left-facing angular arches. When you spot the icon, right-click it and select “Open Network & Internet options.”
Step 2 — Open the adapter options page
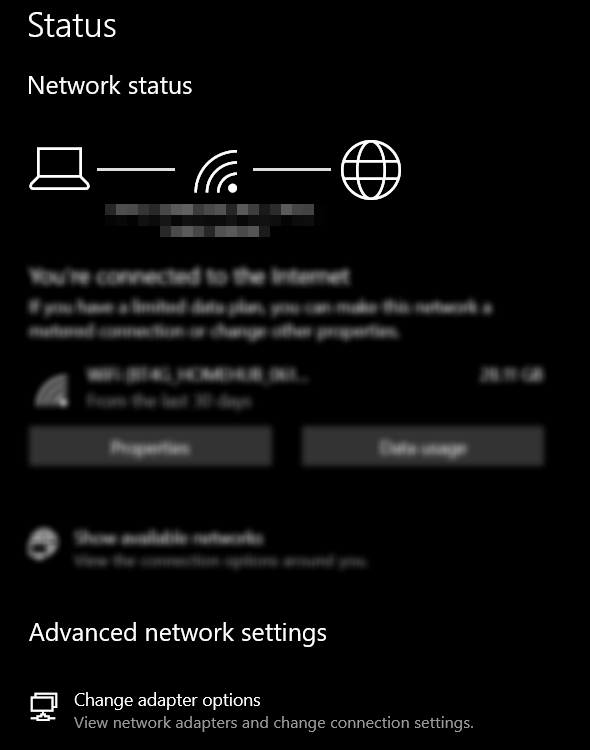
The settings window may look distracting, but it’s not much— I promise. Look under “Advanced network settings.” You will find an option labeled “Change adapter options.” Select it.
Step 3 — View your respective adapter’s properties
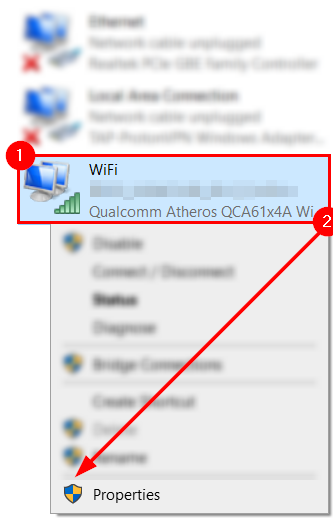
Ahead, you can see your device’s network adapters. Although there may be several, you only need to worry about the “WiFi” or “Ethernet” adapters. If you’re using a wireless connection, right-click “WiFi“; otherwise, right-click “Ethernet.” Regardless of your choice, a menu will appear. Via the menu, select “Properties.” You will need administrative privileges to complete this action.
Step 4 — Enter the Internet Protocol Version 4 properties page
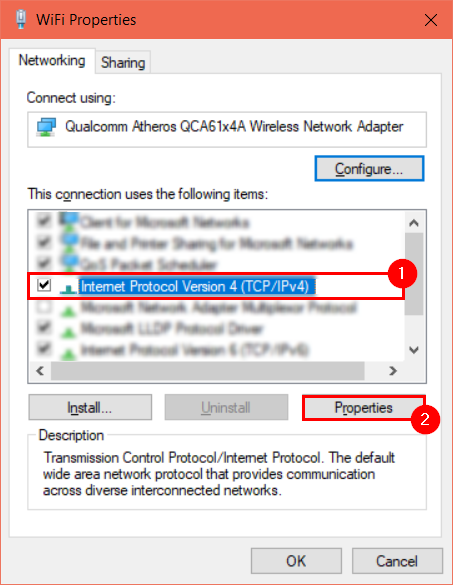
You’ve now reached the most intimidating window— look at all that technical jargon. Fortunately, we won’t be here for very long. First, find and select “Internet Protocol Version 4 (TCP/IPv4).” Then, hit “Properties.” You will open a new window.
Step 5 — Manually configure the following DNS
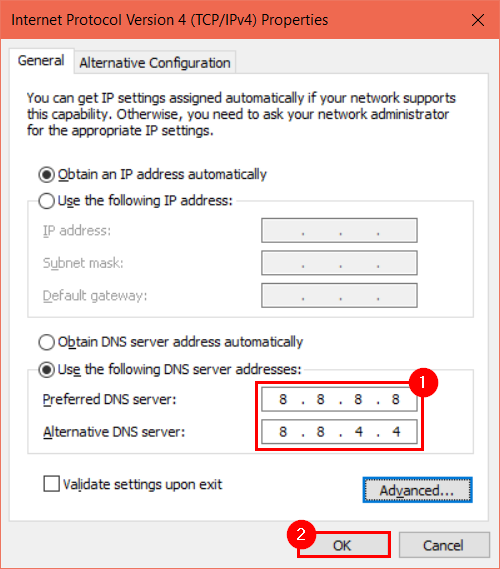
The following window is where we will configure our IPv4 and DNS settings. First, ensure you have deselected “Obtain DNS server address automatically.” “Use the following DNS server address” should be selected instead. Then, enter the preferred DNS “8.8.8.8” and the alternative DNS “8.8.4.4.” Finally, click “OK.”
Have you cleared your Steam download cache?
Step 1 — Launch Steam
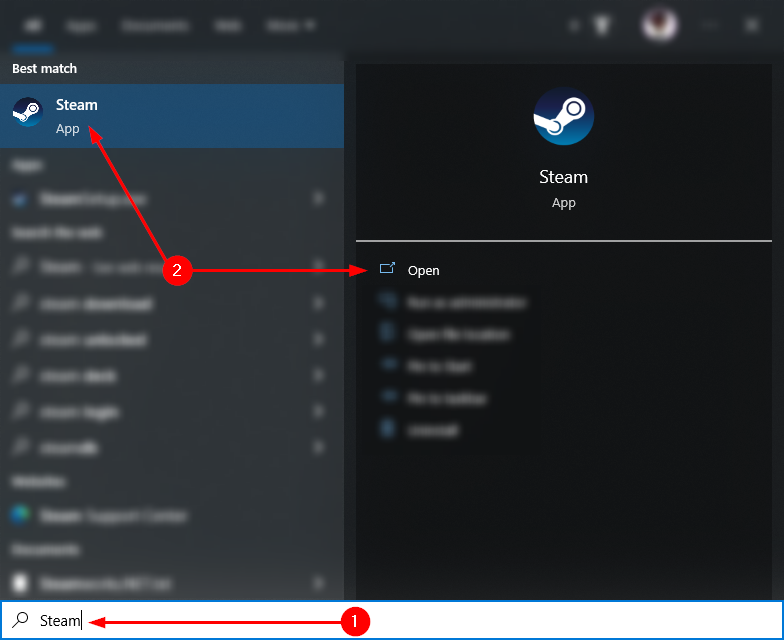
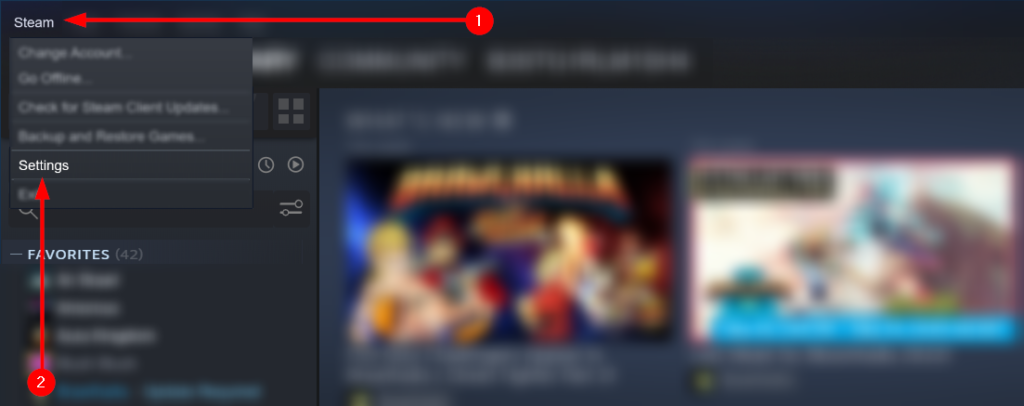
To start, you need to open Steam. To do so, hit “Start,” enter “Steam,” and hit “Enter.” Alternatively, select “Steam” under “Best match.”
Step 2 — Open Steam’s settings
Find and select “Steam” via the taskbar. You will generate a menu. Use the menu to select “Settings.”
Step 3 — Attempt to clear the download cache
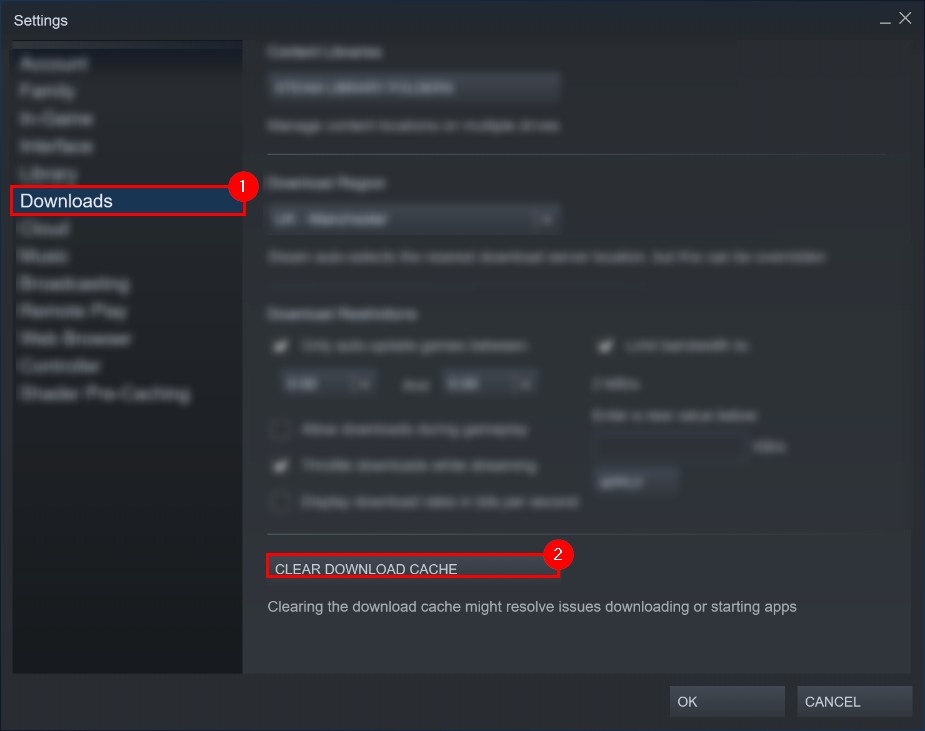
Use the sidebar and select “Downloads.” Then, on the Downloads page, find and select “CLEAR DOWNLOAD CACHE.” This action will not complete the task immediately. Instead, it will create a secondary window.
Step 4 — Confirm your choice
The additional window aims to confirm you understand your choice. If you clear your download cache, you must sign in to Steam again. Select “OK.”

Have you cleared your Steam web browser cache?
Step 1 — Launch Steam’s settings
Use Steam’s taskbar and select “Steam.” Then, select “Settings.”
Step 2 — Delete your web browser data
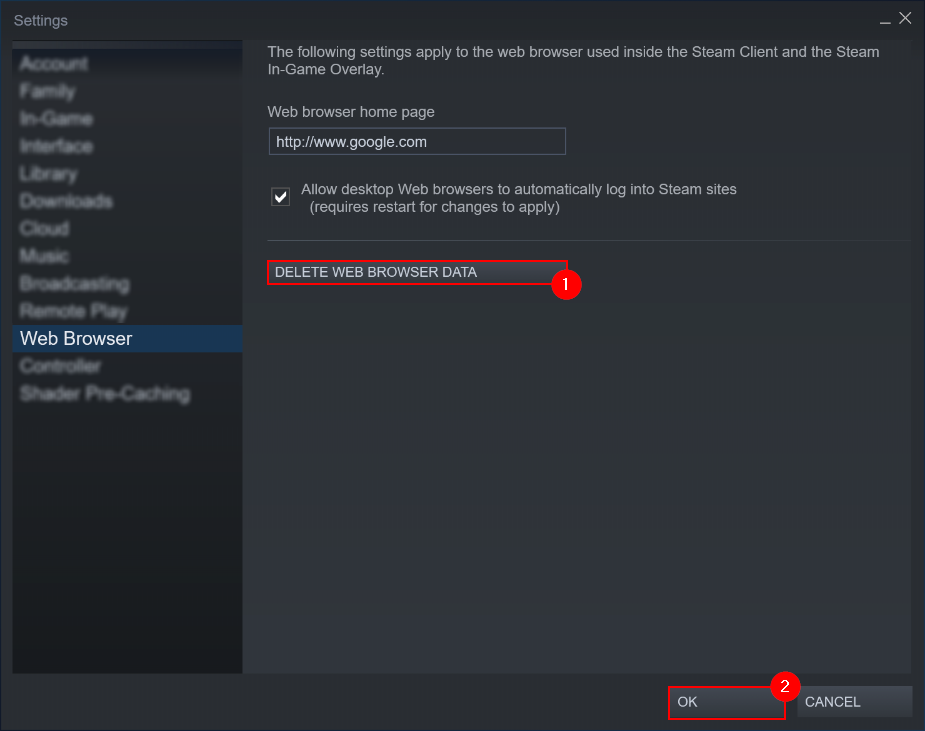
Use the left sidebar to navigate to the “Web Browser” page. Then, at the bottom of the new panel, select “DELETE WEB BROWSER DATA.”
Blog post debrief
If you’re experiencing unusually low download speeds, you should consider updating your network adapters’ drivers, using a trusted DNS, clearing Steam’s download cache, and clearing your web browser’s Steam download cache. If such solutions fail to improve the situation, consider reducing your CPU’s workload or upgrading your computer’s CPU.
If you enjoyed this post, please consider checking out some of our recent posts: