
Valve’s Steam client is almost synonymous with PC gaming, being the primary destination for gamers looking to browse, download, and launch new (or old) games. Albeit, it’s hard to utilize most of those features if your Steam client can’t get online. Fortunately, that’s a problem we can fix in numerous ways.
If you’re experiencing issues getting online with your Steam client, you can try clearing your local download cache (amongst other solutions in this post). Below is a brief guide on the process; however, you can find more detailed instructions later in the post.
- Open the Steam client
- Click “Steam” in the top left
- Select “Settings” from the dropdown
- Open the “Downloads” panel
- Click “CLEAR DOWNLOAD CACHE”
- Confirm your choice
🔎 If this didn’t work for you, you might be interested in our alternate solutions— I have discussed them in much greater detail. 🔎
If you run into issues with the above method or need further guidance, you can consult the post’s in-depth, step-by-step guides. Each guide walks you through solutions with beginner-friendly clarity and assistive screenshots.
Below you will find a list of links; use the links to access relevant content quickly:
- How to clear your Steam download cache
- How to disable enhanced protected mode
- How to use the TCP Steam shortcut
- Blog post recap
How to clear your Steam download cache
Clearing Steam’s download cache is a solid solution for most problems regarding client and network issues within Steam itself. However, clearing the Steam download cache is unadvised if you do not know your account’s login credentials; clearing the Steam download cache will require you to restart and sign back into Steam.
⚠ Don’t attempt the following guide without your Steam account’s credentials at hand.
Step 1 — Open the Steam settings window
At the top of your Steam window, you can spot a bar of actions, one of which is “Steam.” By selecting “Steam,” you will reveal a dropdown with several options. Select “Settings.”

Step 2 — Select clear download cache
The left of the settings window features a list of categories. Select “Downloads.” After doing so, you will notice the right side of the window has changed. At the bottom of the new section, find and click the “CLEAR DOWNLOAD CACHE” button.
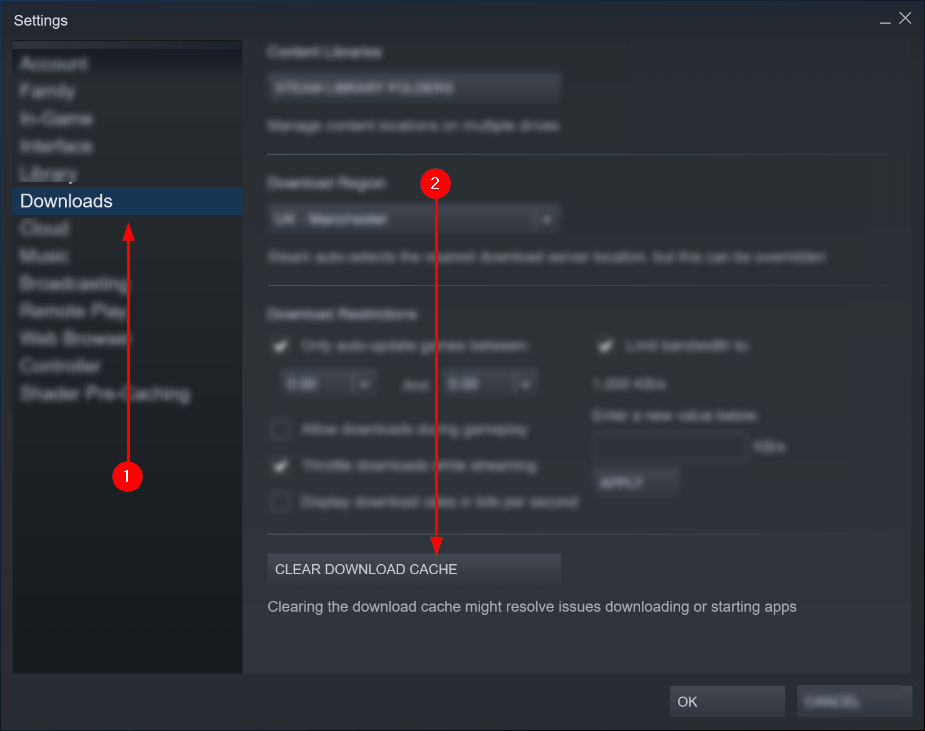
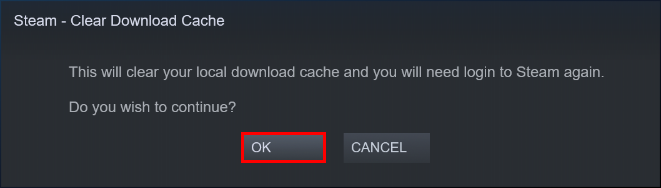
Step 3 — Confirm you’d like to continue
Clearing your local download cache will sign you out and restart the Steam client. After opening the application once more, Steam will prompt you to re-enter your login credentials. Hence, you must confirm your intentions by selecting “OK.”
How to disable enhanced protected mode
Enhanced protected mode is a security feature intended to keep your system safe; however, the system is prone to false flags like all programs. In this context, false flags occur when the feature falsely identifies a secure application as dangerous. If the feature falsely flags Steam as harmful, deactivating it should resolve the issue.
Step 1 — Open the Windows control panel
We can access the control panel by hitting the start or windows key and typing “Control Panel.” After, hit the enter key or select “open” via the results panel— this will open the application.

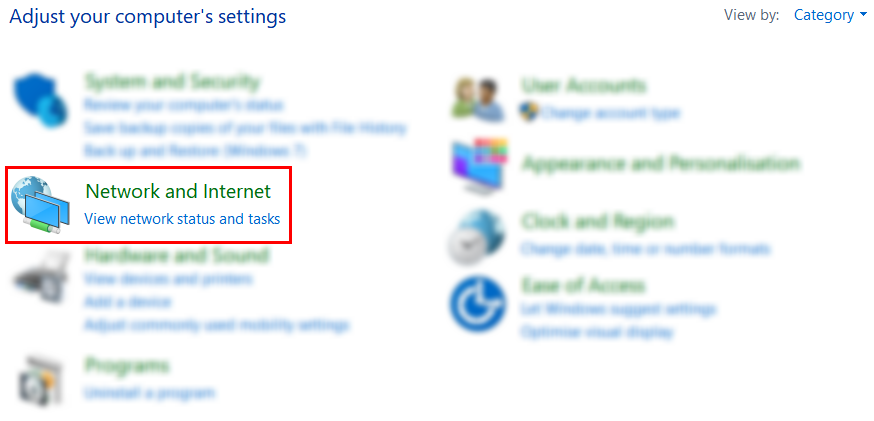
Step 2 — Head to the Network and Internet page
The control panel’s home page features eight key sections. Fortunately, we only need to access one: “Network and Internet.”
Step 3 — Select Network and Sharing Centre
The Network and Internet page features two links: “Internet Options” and Network and Sharing Centre.” Select the latter option.

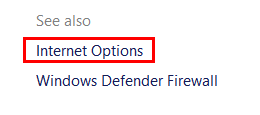
Step 4 — Access the Internet Options window
The next step can be tricky since the link we need to use isn’t a part of the page’s main content; it’s hidden in the bottom left corner. When you spot the “Internet Options” link, give it a click to reveal the “Internet Properties” window.
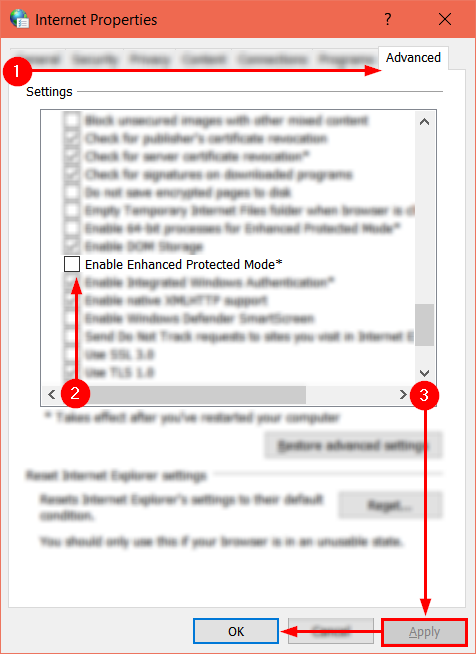
Step 5 — Disable the enhanced protected mode
First, access the “Advanced” tab. You can complete this task by selecting “Advanced” via the tab bar at the top of the window. Alternatively, you can cycle between each tab with the Ctrl+Tab shortcut. In the Advanced tab, you’ll find a checklist. Find and uncheck the list item labeled “Enable Enhanced Protected Mode*—” this may take some scrolling.
How to use the TCP Steam shortcut
Some issues within the Steam client occur when you open it. Fortunately, we can solve these problems by altering how our systems start the Steam client.
💡 You will need a Steam shortcut to complete the following process. If you do not have a Steam shortcut, open your Steam folder, right-click “steam.exe,” and select “copy.” Then, on your desktop, right-click and select “Paste shortcut.”
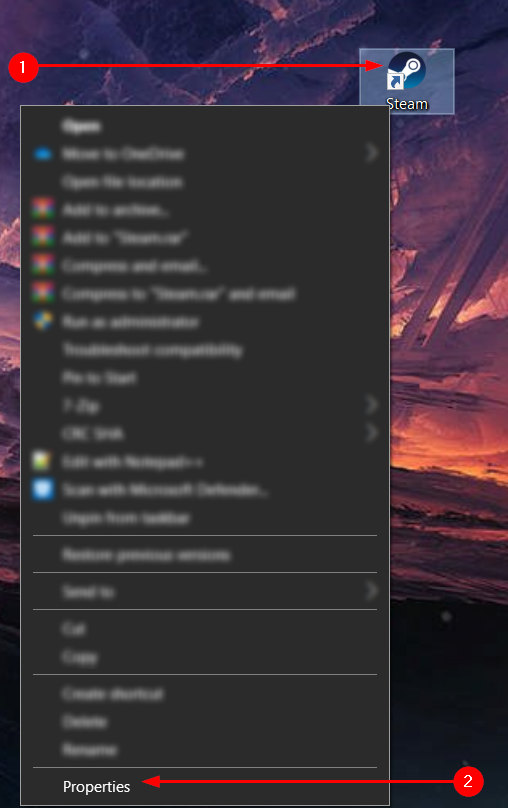
Step 1 — Enter the properties field for your shortcut
Start by selecting and right-clicking your Steam client shortcut to generate a context menu. In the context menu, find and select “Properties—” this will open a new window.
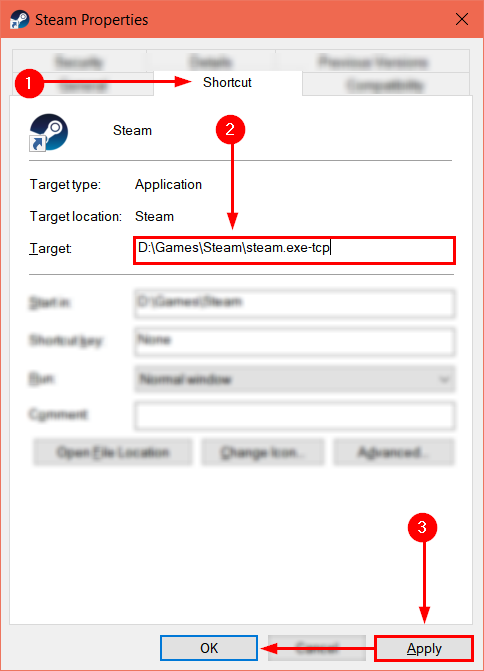
Step 2 — Adjust the target field
We will only be working with one of the properties window’s six tabs: the “Shortcut” tab. From the tab bar, select “Shortcut.” In the Shortcut tab, click the text box labeled “Target” and append -tcp to the end of the pre-submitted directory. Afterward, refer to the buttons at the bottom of the window: click “Apply” followed by “OK.”
Blog post recap
If you’re struggling to get your Steam client online, you can attempt three solutions to resolve the issue. The first solution is to clear your local download cache within the Steam client. However, the second solution is to disable the enhanced protected mode within your internet options. Our third and final solution involves launching your Steam client via a “-tcp” shortcut.
If you liked this post, consider reading our recent posts too: